Kubernetes MCP Server
Posted on Jul 15, 2025Kubernetes (K8s) is like the operating system for modern cloud applications. But, even experienced engineers find themselves wrestling with YAML files, complex deployments, and cluster management headaches.
Enter the Kubernetes MCP Server (K8s MCP) – a smart, AI-friendly bridge that enables tools and agents to securely interact with your Kubernetes cluster.
- What Is the Kubernetes MCP Server?
The K8s MCP Server is a lightweight service that uses the Model Context Protocol (MCP) to expose Kubernetes operations to AI tools in a safe and auditable way.
Think of it as:
– A translator between your AI assistants and your Kubernetes cluster.
– A secure API layer for querying, inspecting, and executing Kubernetes commands.
– A way to let AI-powered IDEs or agents manage K8s, with access control and logging.
- Prerequisites Before You Begin
Before installing the K8s MCP Server, make sure you have:
– A Kubernetes cluster (Minikube, EKS, GKE, etc.)
– kubectl installed and configured
– Node.js + Bun installed (https://bun.sh/)
– (Optional) Helm v3 if you’re using Helm charts
- How to Set Up the K8s MCP Server
1. Clone the Repository:
git clone https://github.com/Flux159/mcp-server-kubernetes.git
cd mcp-server-kubernetes
2. Install Dependencies:
bun install
3. Build the Server:
bun run build && bun start
4. Local Testing with Model Context Protocol Inspector
npx @modelcontextprotocol/inspector node dist/index.js
Follow further instructions on terminal for Inspector link
The MCP Server connects to your current kubectl context. Ensure you’re connected to the correct cluster.
- Testing the Kubernetes MCP Server with Claude Desktop
Make sure that you have Claude installed on your machine.
1. Locate Claude Desktop Configuration:
Find the “claude_desktop_config.json” file in Claude Desktop’s settings (usually found in a Developer or Advanced section).
2. Add the Model Context Protocol Server Configuration:
Add a new entry to the mcp servers section of the “claude_desktop_config.json” file:
{
"mcpServers": {
"mcp-server-kubernetes": {
"command": "node",
"args": ["/path/to/your/mcp-server-kubernetes/dist/index.js"]
}
}
}
Replace “/path/to/your/mcp-server-kubernetes/dist/index.js” with the actual absolute path to the “dist/index.js” file in your cloned repository.
3. Test with Claude Desktop:
Once you have done with the above configurations, restart Claude Desktop. Now, you should be able to interact with your Kubernetes cluster through Claude using natural language commands.
Start by asking Claude to list your pods or create a test deployment to see if the connection to the server works.
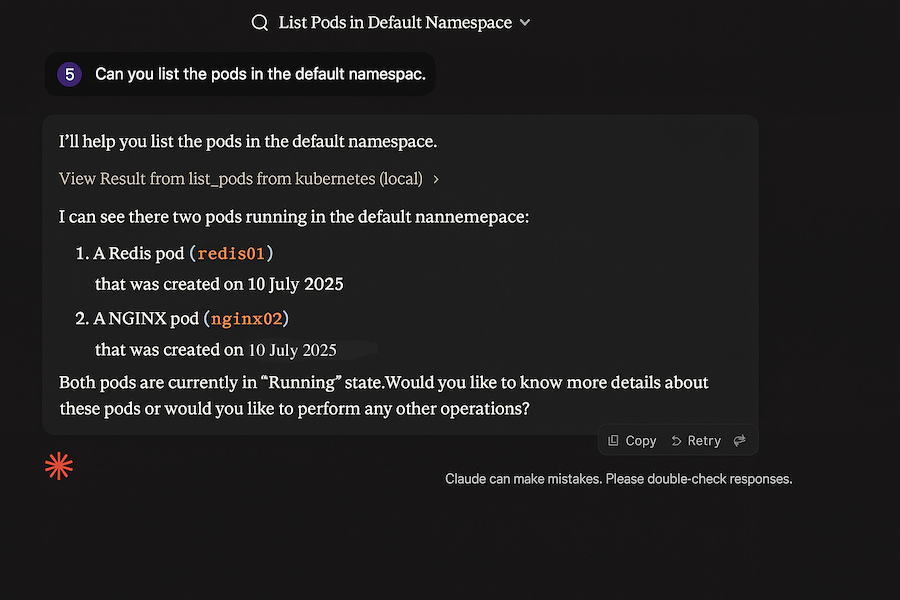
a) Ask to list the pods in the default namespace:
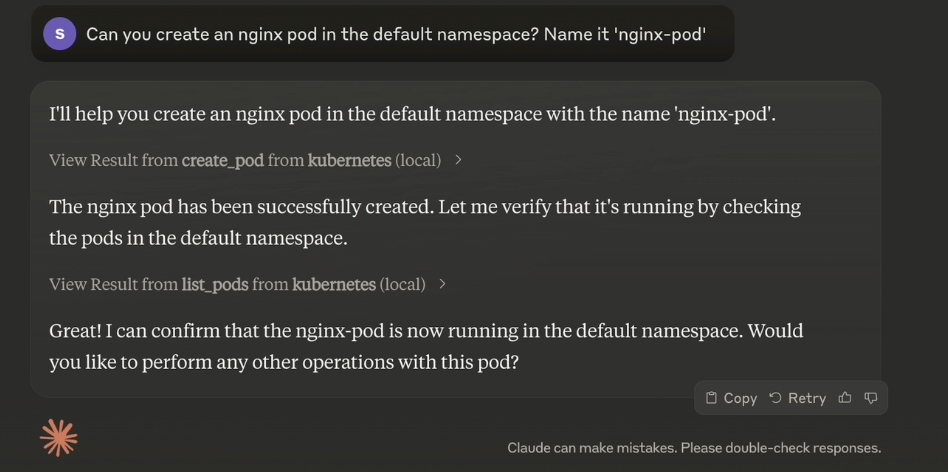
b) Create a test pod:
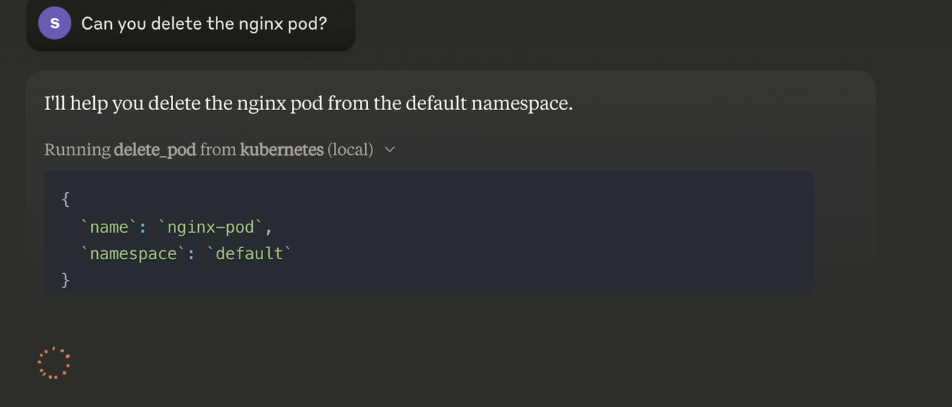
c) Delete the newly created pod:
- Keep Security in Mind
Grant least privilege access to AI agents.
Enable HTTPS/TLS encryption for all communication.
Enable audit logging for all MCP and Kubernetes operations.
Use command whitelisting or rule-based validation before executing any AI-suggested commands.
Manually approve sensitive actions like deleting namespaces or scaling to zero.
Ensure the kubeconfig file used by MCP is readonly or Scoped to a low-privilege user.
Never give AI agents cluster-admin access.
Use Kubernetes NetworkPolicies to limit which pods/services can talk to the MCP server.
Keep all software used by MCP (Node.js, Bun, libraries) up-to-date.
Posted in Ai Agents, Kubernetes
Tagged in ai-agents, kubernetes
Let’s create a measurable impact on
your business.

We aim to be a leading innovator in designing, building and supporting critical business management solutions on cloud platforms that will help transform your organization and align with your business goals
Quick links
Service
